![]()
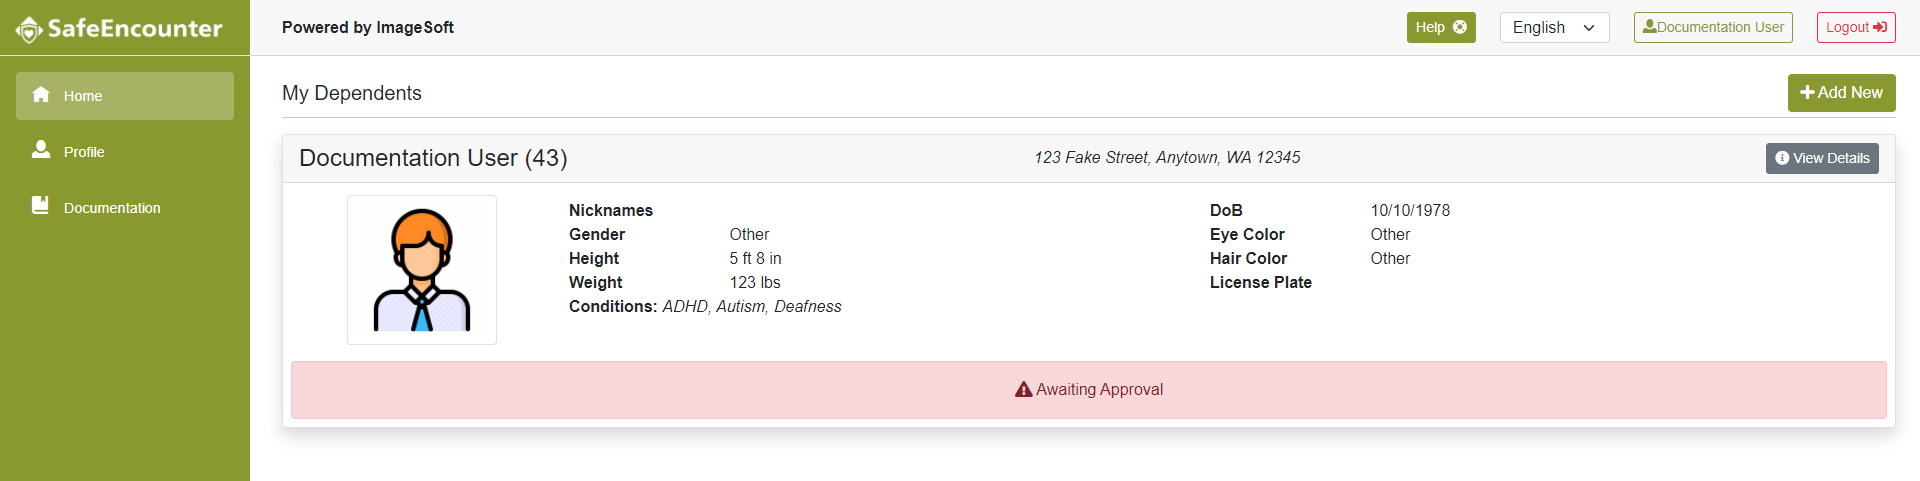
SafeEncounter's Dependents page#
Welcome to SafeEncounter's Dependents page. This is the page that the User will land after logging into SafeEncounter.
Add New#
To add a new Dependent, the User will use the Add New button.
Agency#
The first screen you are presented with is the Select an Agency screen, also known as your Sponsoring Agency.

Your Sponsoring Agency should be the Agency you heard about SafeEncounter from and the Agency you wish to share your Dependent's information with.
The User will need to select an Agency from the drop-down provided to continue to the next screen.
Message#
The second screen you are presented with is the Agency screen.

This is a custom message provided by the Agency that you select.
The User will need to select the Continue button to continue to the next screen.
Dependent Info#
The third screen you are presented with is the Create Dependent screen. This page is broken up into multiple sections and we'll go through them below.
This is the Dependent's Basic Information section.

- First Name
- Last Name
- Photos
- Nicknames - Once you've typed a nickname, you must select it from the drop-down or it won't save.
This is the Dependent's Primary Address section.

- Full Address - When you activate this control, it will pop up an additional prompt.
- Apt/Unit Number
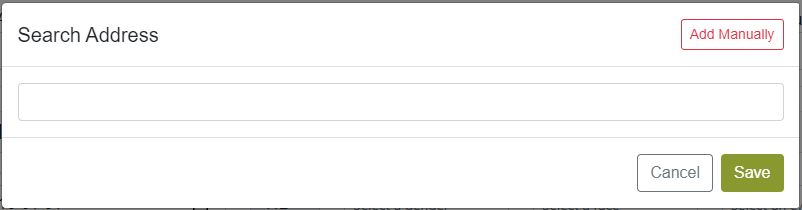
- Search - Once you've typed a partial address, you must select it from the drop-down or it won't save.
- Add Manually - If you can't find your address in the provided search, you can use this button to toggle a second screen.
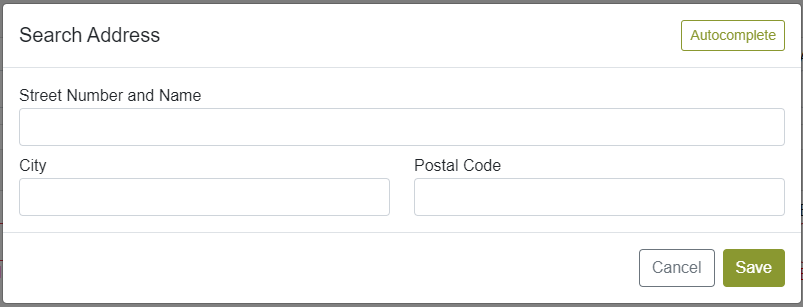
- Autocomplete - This button will take you back to the previous screen.
- Street Number and Name
- City
- Postal Code
This is the Dependent's Additional Information section.
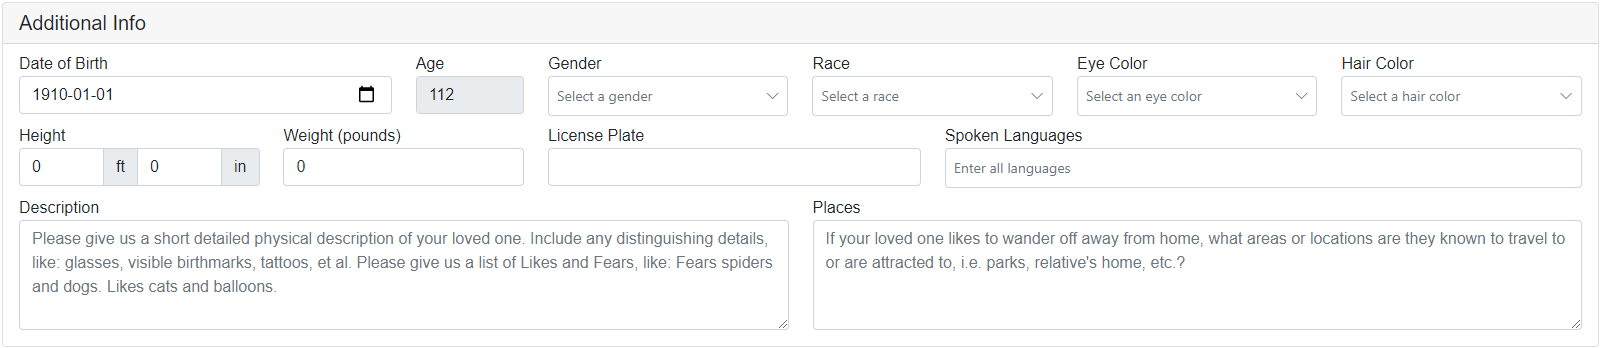
- Date of Birth
- Age
- Gender
- Race
- Eye Color
- Hair Color
- Height (ft)
- Height (in)
- Weight (lbs)
- License Plate - If your Dependent has a vehicle, please ente the License Plate here.
- Spoken Languages - Once you've typed a language, you must select it from the drop-down or it won't save.
- Description
- Places
This is the Dependent's Conditions section.

- Conditions - Once you've typed a condition, you must select it from the drop-down or it won't save. You are allowed to select more than one.
This is the Dependent's Agency Access section.

- Agencies - Once you've typed an agency, you must select it from the drop-down or it won't save. You are allowed to select more than one, or use the Allow all Agencies option.
This is the Dependent's Contacts section.

- Add New - When you use this button, it will bring up an additional prompt.
- Edit
- Delete
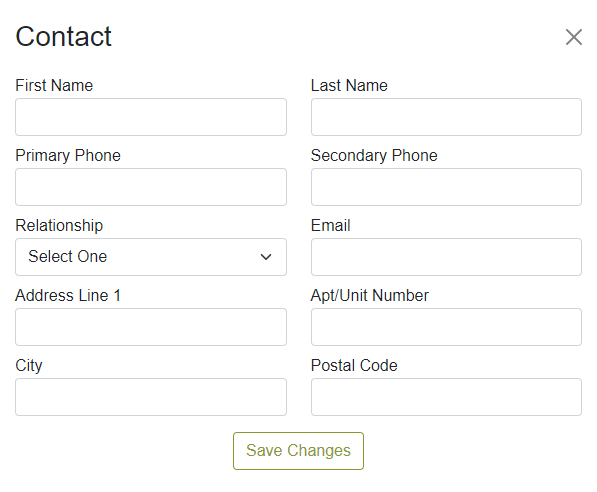
- First Name
- Last Name
- Primary Phone
- Secondary Phone
- Relationship
- Address Line 1
- Apt/Unit Number
- City
- Postal Code
- Save Changes
Once a user is finished filling out the Dependent's information, they will use the Create button to proceed.
Confirmation#
The fourth screen you are presented with is the Confirmation screen.
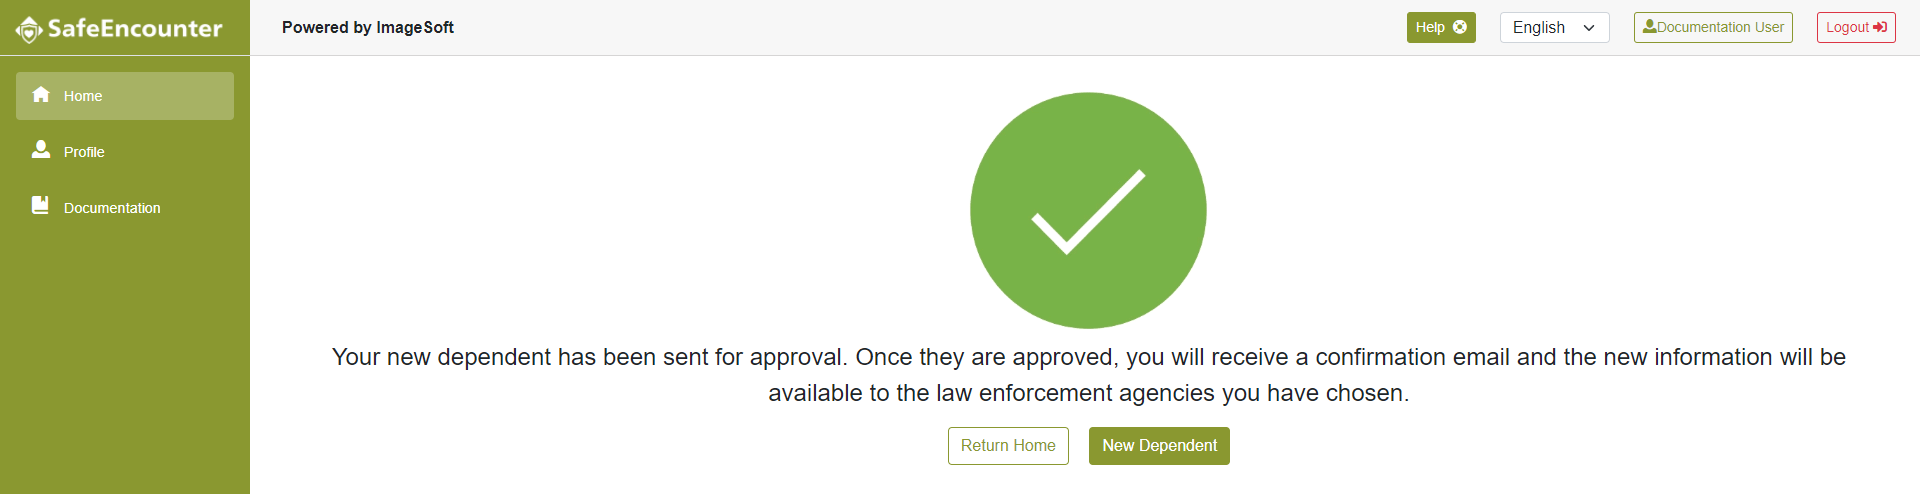
The User has a choice of either returning to the main screen or creating an additional Dependent which will take them back to the beginning of this process.
View Details#
To view the details of a Dependent, the User will use the View Details button. This will take them to the Details page.
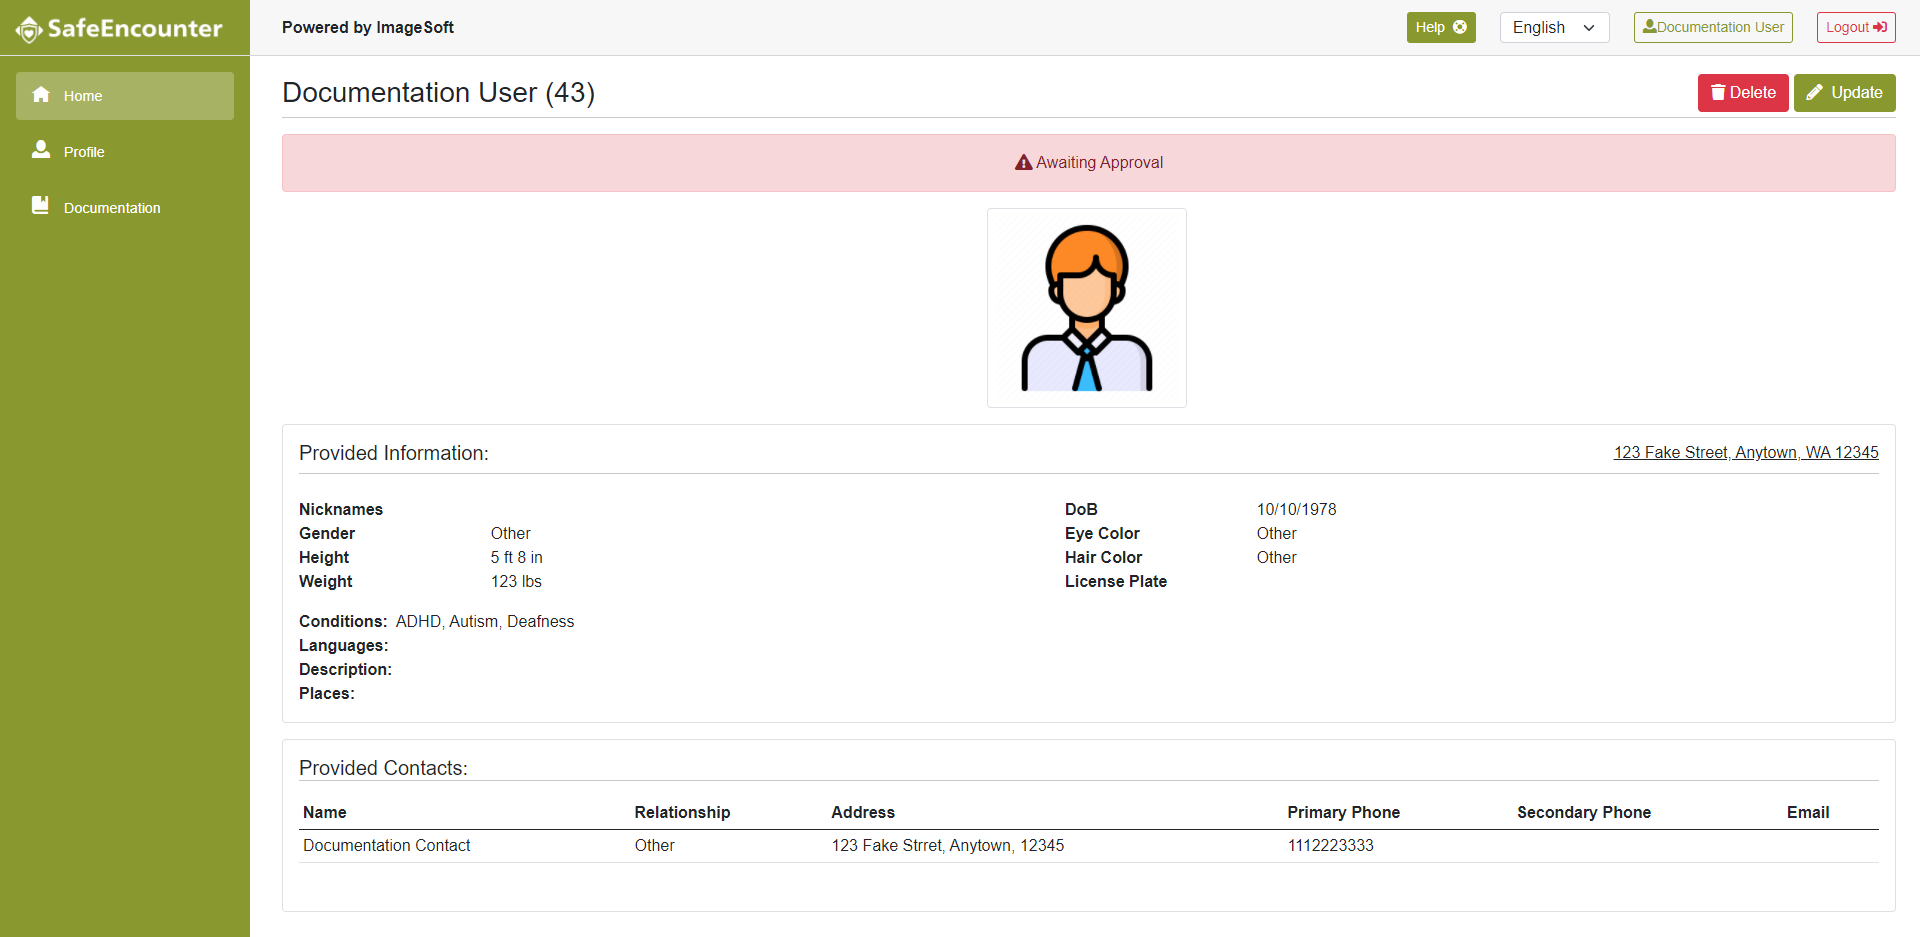
- Delete - When you use this button, it will bring up an additional prompt.
- Update
This page is used to display the Dependent's provided information to the User for review.
Delete#
This is the confirmation prompt that displays when attempting to delete a Dependent.
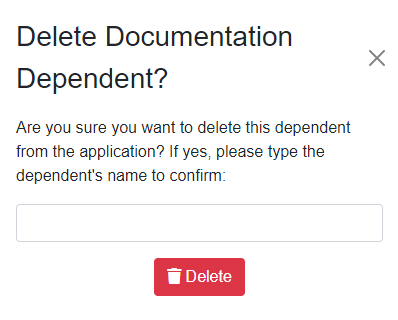
The user needs to provide the Dependent's name to continue.
Update#
The User will be presented with a screen similar to that seen during the Add New Dependent process above with the difference that the fields will be populated with the Dependent's information.
The User can make any changes that are necessary and use the Update button to save their changes.